Connect Amazon RDS
You can connect your MySQL/PostgreSQL database hosted on Amazon RDS to Ubiq with just 2 steps.
Step 1. Add Ubiq's public IP in RDS Security Groups
Access your RDS Management Console.
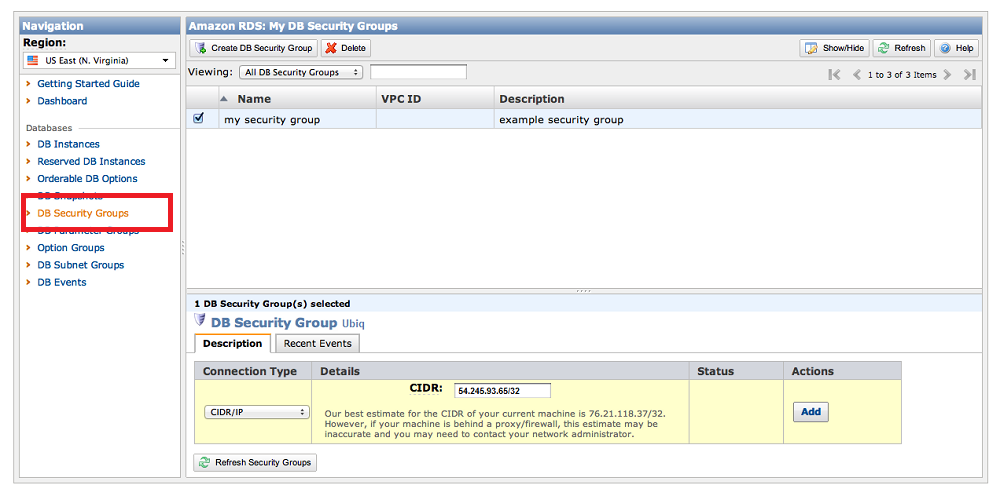
Navigate to DB Security Groups from the left sidebar and select one of your security groups. A form for a CIDR will be presented. Paste the Ubiq CIDR: 54.245.93.65/32 into the form and click Add to add Ubiq to your security group. This will allow Ubiq to access your RDS instance.
*Note to VPC Users: If you're using the Amazon Virtual Private Cloud (VPC) you'll need to add an inbound rule for Ubiq CIDR(54.245.93.65/32) in your VPC Security Groups in the VPC Console. Here are the steps.
Step 2. Create a connection at Ubiq
When you click on Add direct Connection on the Data Sources tab, on project homepage, you will see the following form.
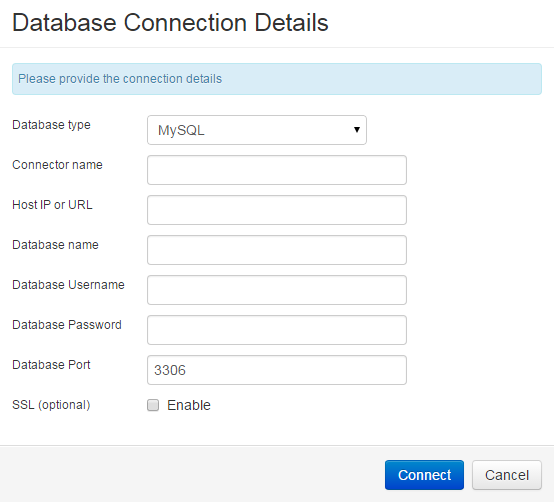
The data connection form has the following fields:
- Database Type - Select the type of database - MySQL/PostgreSQL/ SQL Server
- Connector Name - Connection/Data source name you want to refer the connection as.
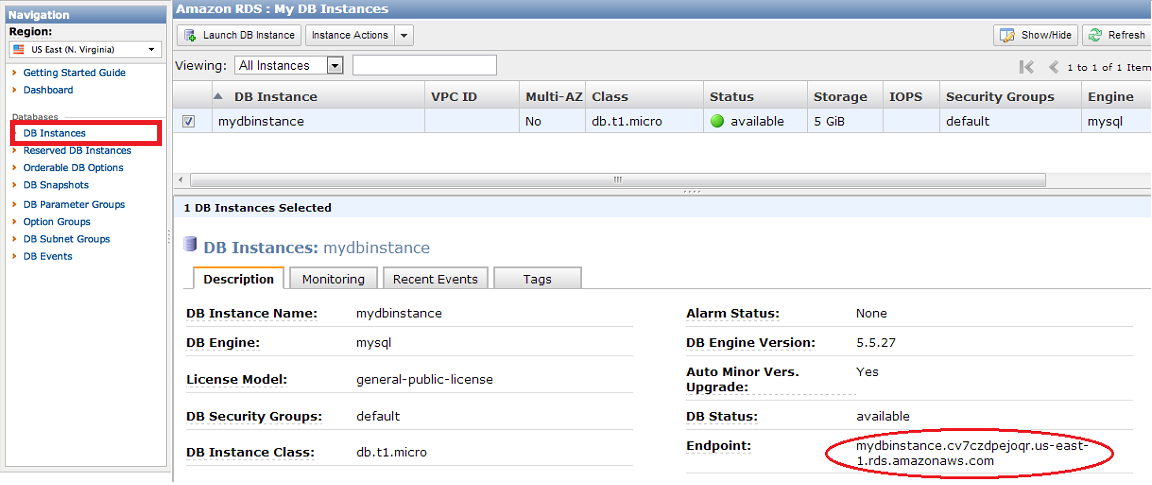
- Host IP or URL - the host name of your RDS instance. If you click on your RDS instance, you can find it as a variable called Endpoint.
- Database name - the name of the database you're connecting
- User name - the name of a preferably read-only user to your database
- Password - the password for the read-only user
- Port Number - the port that the database is listening to (default: 3306 for MySQL, 1433 for SQL Server, 5432 for PostgreSQL).
Please ensure the host name, database name, user name, password & port are entered correctly before you click Connect. On successful connection, you will see the data source listed under the Data Sources Tab. In case of issues, you will see an intuitive message on the screen.
For SSL connections, you can connect your MySQL database hosted on Amazon RDS to Ubiq with just 4 steps.
1. Add Ubiq's public IP in RDS Security Groups
Access your RDS Management Console.
Navigate to DB Security Groups from the left sidebar and select one of your security groups. A form for a CIDR will be presented. Paste the Ubiq CIDR: 54.245.93.65/32 into the form and click Add to add Ubiq to your security group. This will allow Ubiq to access your RDS instance.
Note - If you are using the Amazon Virtual Private Cloud (VPC) you will need to setup an elastic IP to your RDS instance so that it will be accessible outside the your VPC by the Ubiq servers.
2. Create a read-only user in MySQL
Copy & update the following commands and paste them into a MySQL shell to create the user. Please replace the parts in bold below as per your requirement. This will create a read-only user that Ubiq can use to access your database.
CREATE USER $user@'54.245.93.65' IDENTIFIED BY '$password';
GRANT SELECT, SHOW VIEW
ON $database_name.*
TO $user@'54.245.93.65' IDENTIFIED BY '$password' REQUIRE SSL;
FLUSH PRIVILEGES;
Where $database_name, $user, and $password are the values you will be using in the form below. If your database name has spaces in it, please use the name within ``.
3. Create SSL certificates
If you have configured your server to accept SSL connections, you can skip this step. Else, please confirm ssl support on your MySQL installation by typing in your shell:
If you have not added location of MySQL installation to PATH environment variable, you will need to navigate to bin subfolder at your MySQL installation location.
If you see something like [ERROR] mysqld: unknown option '--ssl' it means you need to upgrade your server. MySQL has supported SSL for quite some time so it should not really be a problem.
Please refer to Create SSL certificates to learn how to create SSL certificates.
4. Create a connection at Ubiq
When you click on Create Connection on the Data Sources tab, on project homepage, you will see the following form.
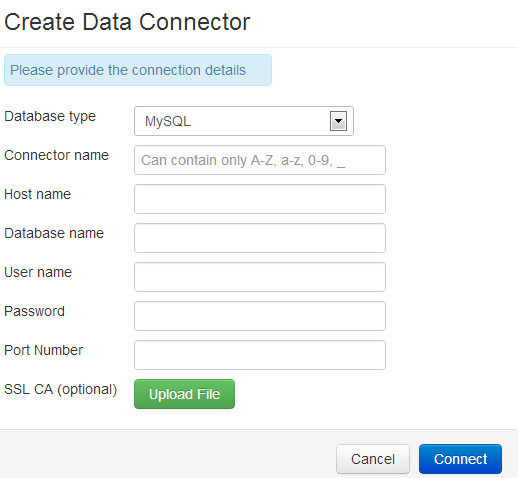
Select the type of database you want to create a connection for. The form has the following fields:
- Connector Name - Connection/Data source name you want to refer the connection as.
- Host name - the host name of your RDS instance. If you click on your RDS instance, you can find it as a variable called Endpoint.
- Database name - the name of the database you're connecting
- User name - the name of a preferably read-only user to your database
- Password - the password for the read-only user
- Port Number - the port that the database is listening to (default: 3306 for MySQL, 5432 for PostgreSQL). You can locate it in my.conf(linux) or my.ini(windows) under the line [client]
- SSL CA - upload the .pem file of certification authority (ca-cert.pem created in Step 3) here.
Please ensure the host name, database name, user name, password & port are entered correctly before you click Connect. On successful connection, you will see the data source listed under the Data Sources Tab. In case of issues, you will see an intuitive message on the screen.