Connect MySQL database
Step 1. Create a read only user for Ubiq
Log into MySQL as admin. Replace the parts in bold below and type the following commands into a MySQL shell. 54.245.93.65 is the public IP of Ubiq and $database_name, $user, and $password are database user details.
CREATE USER '$user'@'54.245.93.65' IDENTIFIED BY '$password';
GRANT SELECT, SHOW VIEW ON $database_name.* TO $user@'54.245.93.65' IDENTIFIED BY '$password';
FLUSH PRIVILEGES;
Open the file my.conf in linux (located at /etc/mysql/my.cnf) or my.ini in windows (located at C:\Program Files\MySQL\MySQL Server 5.x\ where 5.x is mysql version) in your mysql installation location and comment the line bind-address=127.0.0.1. This enables Ubiq to connect to MySQL. If you don't find this line in file, leave it unchanged.
Update firewall permissions for MySQL port(3306) to allow access to Ubiq's IP(54.245.93.65)
.Step 2. Restart MySQL server
Linux : enter this command in shell (keyword sudo is optional)
Windows : Open command prompt in administrator mode (search for cmd.exe file, right click on file icon and select "Run as administrator") & enter these commands in command prompt
net start mysql
Step 3. Create connection
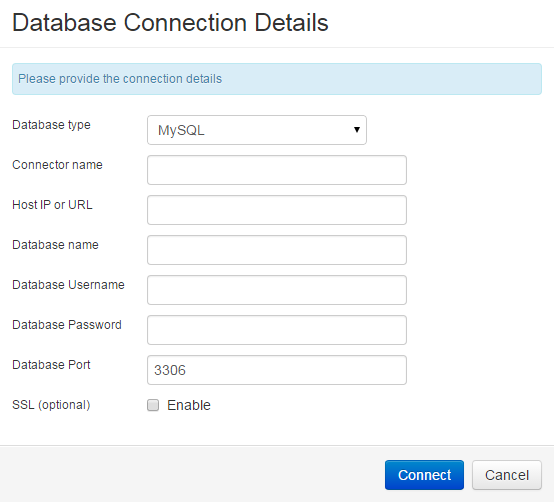
When you click on Add direct Connection on the Data Sources tab, on project homepage, you will see the following form.

The form has the following fields:
- Connector Name - Connection/Data source name you want to refer the connection as.
- Host name - the host name or IP address of the server your database is hosted on
- Database name - the name of the database you're connecting
- User name - the name of a read-only user to your database
- Password - the password for the read-only user
- Port Number - the port that the database is listening to (default: 3306)
Please ensure the host name, database name, user name, password & port are entered correctly before you click Connect. On successful connection, you will see the data source listed under the Data Sources Tab. In case of issues, please don't hesitate to mail us at contact@ubiq.co if you face any issues. We surely reply within a day.