Setup ubiq for MySQL database on your laptop/intranet
Step 1 - Download & unzip ubiq agent
After unzipping the file, click Next
Double click downloaded file to unzip. After unzipping file, click Next
Open Shell(Terminal). Type the following & press enter.
For rpm based systems - Red Hat, SUSE, Fedora, CentOS, etc
					yum install sudo (if sudo command is not present)
					sudo curl -O http://ubiq.co/static/ubiq_linux_rpm.tar.gz
					sudo tar -pzxf ubiq_linux_rpm.tar.gz
					cd ubiq_linux_rpm
					sudo chmod +x manage.sh
For debian based systems - Ubuntu, Debian, etc
					apt-get install sudo (if sudo command is not present)
					sudo curl -O http://ubiq.co/static/ubiq_linux_deb.tar.gz
					sudo tar -pzxf ubiq_linux_deb.tar.gz
					cd ubiq_linux_deb
					sudo chmod +x manage.sh
After executing these commands, click Next
Step 2 - Setup ubiq agent
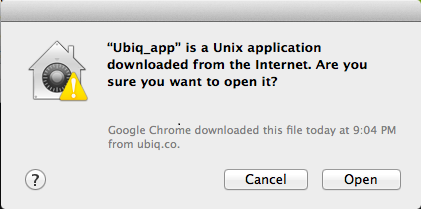
Open unzipped folder(ubiq_mac) and double click on Ubiq_App. Click open to run Ubiq_App. Enter your Mac account/admin password if asked.
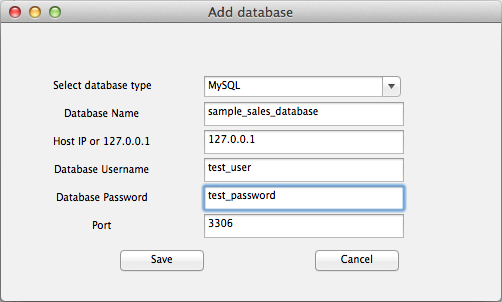
Next, add user details for at least one of your databases for ubiq agent. When you save the details, ubiq agent will be started automatically as shown.
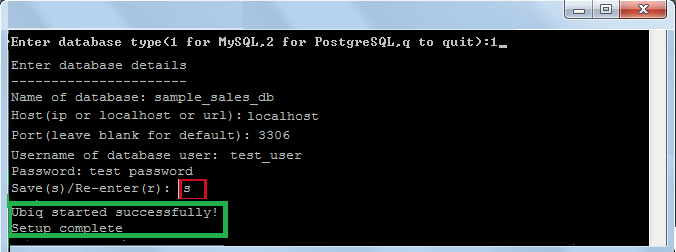
Open shell. Navigate to the unzipped folder(e.g ubiq_linux). Type the following & press enter
Next, add user details for at least one of your databases for ubiq agent. When you save the details, ubiq agent will be started automatically in background.
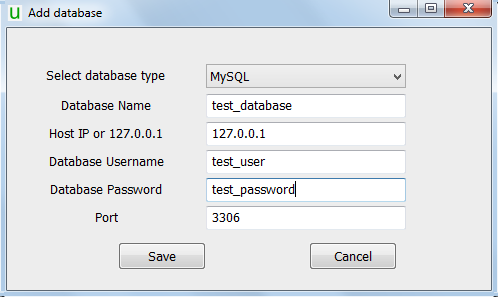
Open the unzipped folder(ubiq_windows) and double click on Manage_ubiq. Next, add user details for at least one of your databases for ubiq agent and click Save. Ubiq agent will be started automatically in background.
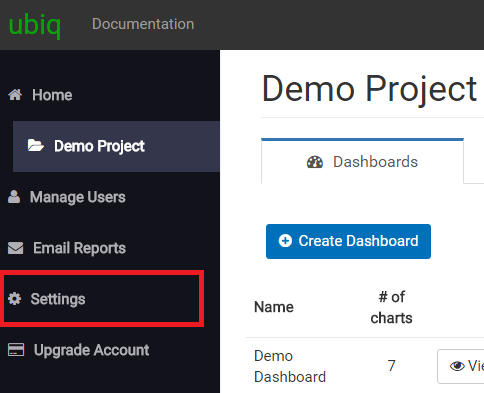
Step 3 - Update IP
Go to Home > Settings. Update the IP to 127.0.0.1 if not done already. If you download the client to a remote server, then enter its IP. Ubiq agent listens on port 39393. If you have downloaded the client to a machine other than your local desktop/laptop then add an inbound rule for port 39393 in your firewall.
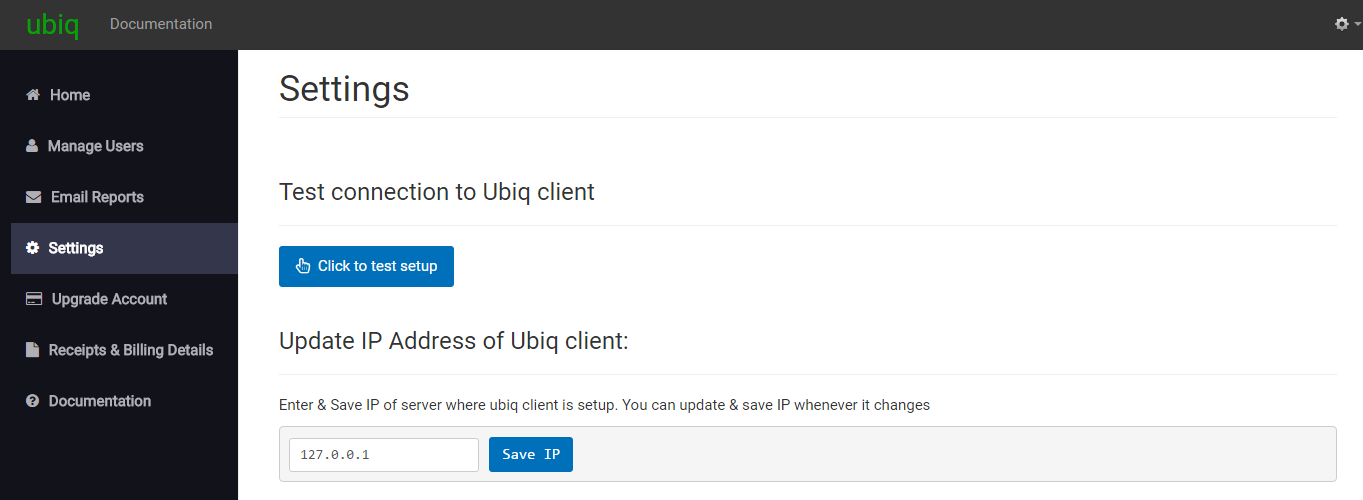
Step 4 - Test setup
Go to Home > Settings. Click on Test Setup button (shown above) to test it. You should see a popup saying setup successful.